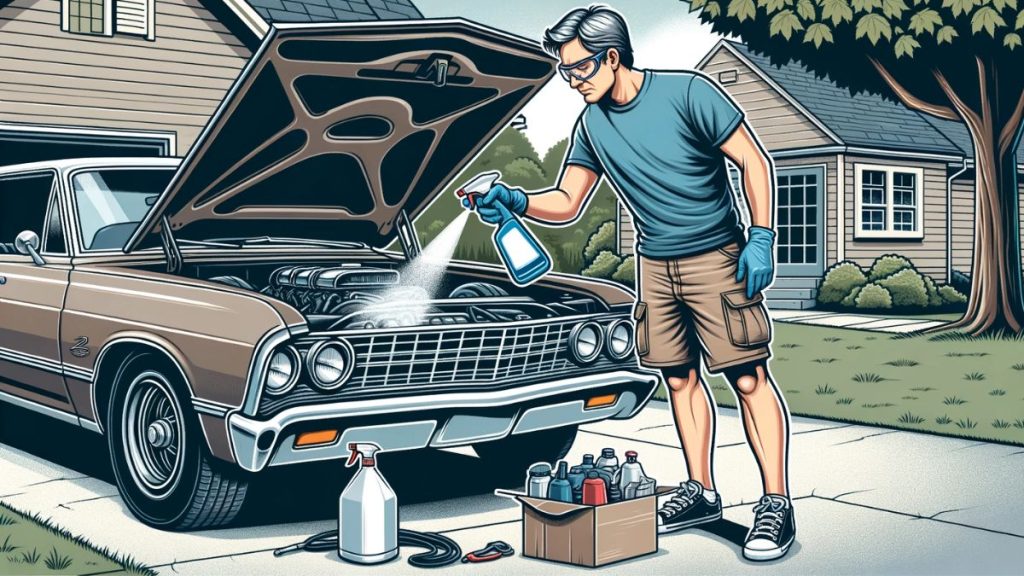
Lots of folks get nervous about washing the part of the car where the engine is. They’re scared they might break it. So, I made this super easy guide to help you clean your car’s engine bay safely without messing anything up.
Steps To Clean Car Engine Bay:
- Remove larger pieces of dirt, such as leaves and twigs.
- Spray all-purpose cleaner on the entire engine bay area, including hood.
- Agitate the engine bay with a stiffer detailing brush.
- Rinse the whole engine bay with a pressure washer from a distance.
- Inspect the engine bay and spot-clean if needed.
- Wipe dry the hood with a microfiber cloth.
- Apply dressing to all plastic parts.
- Blow out excess water with an air compressor.
Prepare The Engine Bay For Cleaning
Before you start cleaning the engine bay, you should take a few preparatory steps to ensure the safety and effectiveness of your efforts. Here’s how I like to prepare my vehicle for engine bay detailing:
- Cool it down. You should always start with an engine that is cool to the touch. If you’ve recently driven your car, let the engine cool down for at least 30 minutes before you start the cleaning process. Attempting to clean a hot engine can cause damage to the components and also pose a safety risk to you.
- Protect sensitive components. If you’re concerned about causing damage to sensitive parts of the engine, consider covering them with plastic bags. Components like the ECU, alternator, spark plugs, and ignition cables should be protected to prevent any water or cleaning solution from causing harm. Just make sure to remove the plastic bags once the cleaning process is complete.
- Work in the shade. You should clean your car’s engine bay from direct sunlight. This helps prevent the cleaning products from drying too quickly on the surface, which can make the cleaning process more difficult and less effective. So, find a shaded area or, even better, a garage if possible.
By taking these simple precautions, you can set yourself up for a successful engine bay cleaning experience and help protect your vehicle from any potential damage during the detailing.
Engine Bay Cleaning: Step By Step Guide
Finally, after a pretty long introduction and explanation of everything you’ll need, here’s a thorough guide on how to detail a car engine bay in a safe and efficient way.
What you’ll need for deep cleaning the car engine bay:
- All-Purpose Cleaner (APC). An APC, such as Meguiar's All-Purpose Cleaner diluted 1:10 or 1:5, is essential for breaking down dirt, grime, and oils in your engine bay.
- Foam cannon. A foam cannon is used for spraying the APC on the engine bay in the form of foam, making it easier to clean and agitate the dirt. You’ll also spend fewer products this way.
- Detailing brush. A detailing brush is crucial for agitating and cleaning the engine bay, as it helps to loosen dirt, oils, and grime.
- Pressure washer. A car pressure washer is safer than a garden hose for rinsing the car’s engine bay as it uses less water at a higher pressure, reducing the risk of soaking sensitive engine components.
- Bottle sprayer with APC. A bottle sprayer filled with diluted APC is useful for spot-cleaning any areas that you may have missed during the initial wash.
- Microfiber cloths. Microfiber cloths for cars are essential for wiping off the hood after you rinse it, ensuring a clean and dry surface.
- Purple Power Degreaser (or any other). Degreasers are optional products, but they’re helpful if your car’s engine is extremely oily, as those degreasers can break down stubborn grease and grime more effectively than APC alone.
- Plastic Detailer. I suggest using Sonax Plastic Detailer diluted 1:1. It’s a great addition that can be applied to wet surfaces and helps protect and enhance the appearance of plastic components.
- Air compressor. An air compressor is also an optional tool that you can use to dry the engine quickly after washing, which will help to prevent water spots and reduce the risk of damage from trapped moisture.
1. Remove Larger Pieces of Dirtt
The first step in cleaning your car’s engine bay is to remove any larger debris, such as leaves, twigs, and branches, that may have accumulated in the area. These larger pieces of trash are often trapped close to the windshield, particularly in the plastic sections surrounding the engine bay.
To remove this debris, you can use your hands to pick out the larger pieces carefully. But if you prefer, you can also use a vacuum cleaner to suck up those.
This is an important step because you’ll have a much cleaner area, and cleaning products will be able to work better.
2. Spray APC on the Entire Engine Bay Area and The Hood
After removing larger debris from the engine bay, you should spray the all-purpose cleaner to break down dirt, grime, and grease. To do this, dilute the APC at 1:10 or 1:5 for very dirty engines.
With the APC solution ready, begin spraying it over the entire engine bay and the underside of the hood. Be thorough in your application, and make sure that you cover every inch of the engine bay.
After spraying all-purpose cleaner all over the engine compartment, let it dwell for about a minute. This will allow the cleaning agents to penetrate and break down the dirt and grime, which will help you a lot in the following steps.
3. Agitate Everything With a Detailing Brush
Once the all-purpose cleaner has had a chance to dwell, it’s time to use a car detailing brush to agitate all areas of the engine bay. There’s no need to go too deep into the engine space, as it’s nearly impossible to clean those areas entirely with a brush.
As you work, be thorough but gentle with your brush strokes to avoid causing any damage to the engine components. You can also periodically spray a bit of an all-purpose cleaner directly onto the detailing brush to boost its cleaning effectiveness.
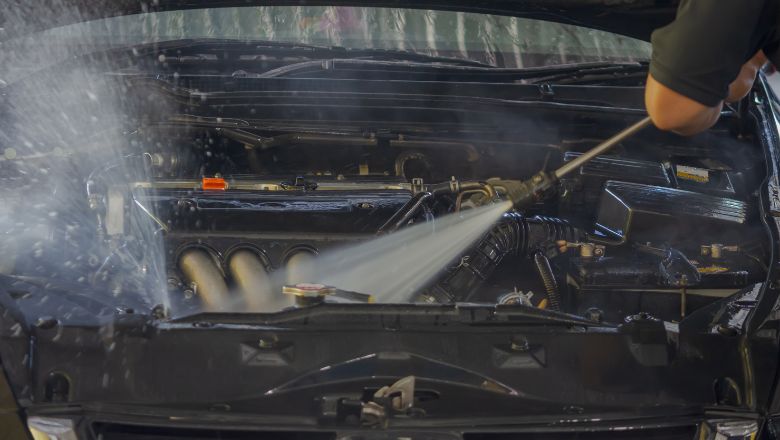
4. Rinse The Engine Bay
After agitating the dirt and grime with a detailing brush, it’s time to rinse everything off using a pressure washer. This step is essential for removing the loosened dirt, cleaning solution, and any remaining debris from the engine bay and hood.
When rinsing the hood, be mindful not to spray too much water onto the engine sound insulation, as excessive water can cause damage to the material. For the engine bay, maintain a safe distance of at least 50 cm (approximately 20 inches) from the engine components to prevent any damage caused by high-pressure water.
While rinsing the engine bay, take advantage of the pressure washer’s reach by directing the wand deeper into the engine space. This will help clean the engine block, carter, and other hard-to-reach areas that were inaccessible with the detailing brush.
5. Inspect The Engine Bay And Spot Clean If Needed
Once you’ve rinsed the engine bay with the pressure washer, take a moment to inspect the area for any spots that you may have accidentally missed or that are still dirty or oily. Thoroughly examine the engine bay, looking for any areas that require additional attention.
If you find any spots that need further cleaning, spray some Purple Power Degreaser directly onto your detailing brush and gently scrub the affected area. The concentrated cleaning solution will help break down any remaining dirt or grime, ensuring a thorough cleaning.
After spot-cleaning the missed areas, quickly rinse those parts again with the pressure washer to remove any residual cleaning solution and dislodged dirt.
6. Wipe Off The Hood With a Microfiber Towel
After rinsing and spot cleaning, it’s time to dry the underside of the hood to prevent any water spots from forming. To do this, use a clean microfiber cloth to wipe off the hood gently. Microfiber towels are highly absorbent and will effectively remove water and any lingering oils or dirt that may have been left behind after rinsing.
While you might be tempted to use the microfiber cloth on the engine bay itself, hold off on that for now. In the next step, I’ll introduce a better method for dealing with excess water and any remaining dirt in the engine bay.
7. Apply Dressing To Wet Engine Bay
Once you’ve finished cleaning and rinsing the engine bay, it’s time to apply a dressing to protect and enhance the appearance of the plastic components.

I recommend using Sonax Plastic Detailer (check above) diluted 1:1 for this purpose, as it works exceptionally well when applied to a wet surface. Alternatively, you can also use Carpro Pearl, another fantastic product for dressing the engine bay.
To apply the dressing, spray the entire engine bay area thoroughly with the Sonax Plastic Detailer or your preferred product. Don’t worry about using too much; the product is designed to mix with the water on the surface, helping it to blend evenly across all the plastics. This will not only make the components look new but also provide a layer of protection.
This method of dressing the car’s engine bay while it’s still wet is one of the easiest and most effective techniques I’ve discovered. It saves time compared to drying the entire engine bay before applying conditioners, and it provides excellent results.
After spraying the dressing on the entire engine bay, you can either leave it to dry naturally or, if you prefer a more detailed approach, proceed to the next step, where you’ll use compressed air to dry the area quickly.
8. Blow Out Excess Water With a Compressor

To achieve a more detailed and professional finish, you can use compressed air to blow out excess water from the engine bay. This step helps to dry the area not only quickly but also evenly spreads the plastic detailer that you’ve just applied. The air stream will assist in distributing the product across all surfaces, ensuring a uniform and polished appearance.
In addition to drying the engine bay and spreading the dressing, using compressed air also helps to remove water from crevices and hard-to-reach areas, such as around the headlights and other places where water might be trapped. This prevents any leftover moisture from causing issues later on.
To do this, use an air compressor with a suitable nozzle and direct the airflow over the engine bay, paying special attention to those hard-to-reach areas. As you blow out the excess water, you’ll notice the engine bay drying quickly, and the dressing is evenly spread, resulting in a clean, protected, and showroom-worthy finish.
If you’re looking for an even simpler solution, feel free to check out the video below. It’s also a fantastic explanation, but the final result won’t be anywhere near mine.
Is It Safe To Wash Car Engine Bay?
When we talk about the safety of detailing the engine bay, it mostly depends on the type of vehicle and the precautions you take during the process. In most modern cars, the engine bay is designed with tons of protective covers and shielding for all sensitive components, making it safe to clean.
Diesel cars are generally safer to wash than gasoline cars, as they have fewer sensitive electrical components that may be affected by water.
It’s still important to exercise caution and follow the proper guidelines when cleaning your engine bay. You should pay particular attention to sensitive electrical elements such as the alternator, ECU, spark plugs, car battery, and other similar components. If you’re concerned about potential damage, you can take extra care when washing these areas by wrapping a plastic bag around them.
For owners of older cars, you may need to be a bit more cautious during the cleaning process, as these vehicles may not have the same level of protection for their sensitive components.
By following the steps outlined in this guide, you can still safely clean your engine bay without causing any harm to your vehicle. Ultimately, the key to a successful engine bay cleaning is patience, attention to detail, and adherence to proper techniques.
Frequently Asked Questions
It’s best to wash the engine bay before everything else on the car. This is because cleaning the engine bay can be a messy task, and you’ll want to avoid getting dirt and grime on the freshly washed exterior.
While WD-40 can work for cleaning the engine bay, it’s not the recommended method. The approach outlined in this guide, using an APC or degreaser, is more effective and provides better results in removing dirt and oils.
Cleaning the engine bay with soapy water is not advised, as it may introduce too much water into sensitive components. Although it can work if you’re cautious, soapy water is less effective than using APCs or degreasers for cleaning the engine bay.
Yes, you can clean the engine bay with a water hose, but you need to be extremely careful not to spray too much water inside. Using a pressure washer is the recommended method, as it provides more control and precision while cleaning the engine bay area.
If you want to maintain your car comprehensively, then yes, the engine bay should be washed. Keeping the engine bay clean can contribute to the car’s overall appearance and may increase its resale value.
After cleaning the engine bay, it’s a good idea to wait at least 30 minutes before starting your vehicle. If possible, leaving it overnight to dry completely is the best option, especially if you don’t need to use the car immediately.
Yes, it’s completely normal for engine bays to get dirty. While driving, the engine bay is exposed to exhaust vapors, dust, dirt, and various other contaminants. It’s impossible for the engine bay to remain clean all the time, which is why regular cleaning is important for maintaining your car’s overall condition.