Removing paint protection film from cars doesn’t happen very often, and people aren’t extremely experienced in it. Because of that, PPF removal is slightly complicated.
Today, I’ll show you the ultimate guide on how to remove paint protection film from your car. In my opinion, this is the best and easiest way to remove PPF from cars.
Key Takeaways:
- Use heat to loosen the PPF adhesive and peel the film with your hands.
- After PPF removal, some adhesives will be left behind, which should be removed by adhesive removers.
- After the whole PPF removal process, washing your car is crucial to prepare the vehicle for new paint protection.
How To Remove PPF: Step-by-step Instructions
If you ever removed some stickers or 3M tapes, the whole process will be more familiar to you. So, without further ado, let’s start with the steps. This method works for all brands of clear bras (3M, XPEL, Stek, etc.).
Tools required for PPF removal:
- Heat gun or steamer
- A few microfiber cloths
- Tar and glue remover
- Plastic razor scraper (better to avoid it, but it’s good to have it prepared)
- Car wash kit
As you can see, you don’t actually need plenty of equipment. All of us car guys will have most of these already.
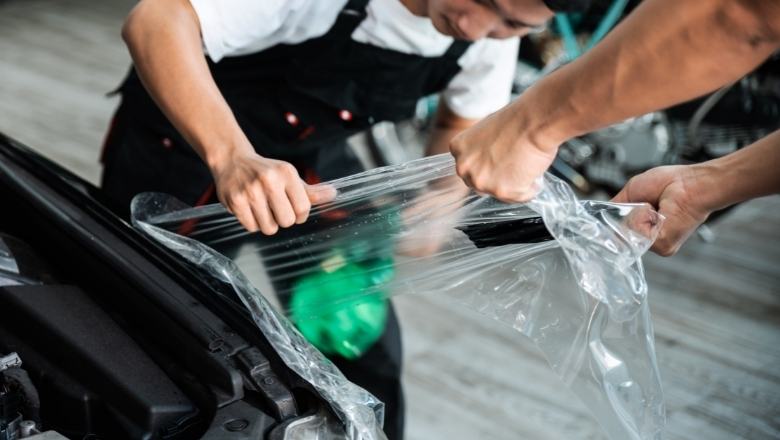
1. Heat and Peel The PPF
The first step is to heat the PPF and peel it simultaneously.
Here are the steps I always do:
2. Remove PPF Adhesive Residue
After you’ve removed the paint protection film, there’s often some adhesive residue left on the paint. While careful peeling can minimize this residue, it’s challenging to avoid it entirely.
The steps to remove PPF adhesive:
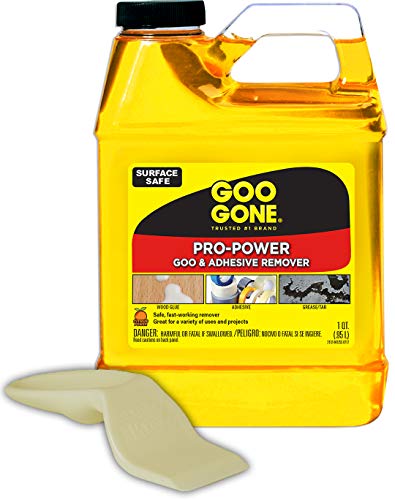
Throughout this process, always use pristine microfiber towels to prevent any potential scratches to the paint.
3. Wash The Car
After removing the whole PPF from your vehicle, you should thoroughly wash the car. That way, you’ll prepare the vehicle for paint correction or re-application of PPF or other paint protection products.
If you don’t know the proper steps for washing your vehicle (many people don’t, actually), here’s my guide on washing your car the right way.
Why Do People Remove Paint Protection Film From Cars?
You are probably interested in why people remove paint protection film from your car and when you should attempt to remove it. I won’t go long here; I’ll just give you a few examples of when you should remove the PPF from your vehicle.
Reasons to remove clear bra from your car:
- PPF has significant damage (tearing apart, rock chips damage, deep scratches, etc.) and needs to be replaced
- The yellowish color of the film or glue beneath because of the oxidation
- You want to replace the PPF with a new one (it’s been on the paint for a long time, such as 8-10 years)
- You want to try other forms of paint protection (waxes, sealants, ceramic coatings)
- You’re selling the car and want it to look like a new
- The car’s paint beneath the PPF is damaged and needs to be fixed
- You’re not happy with the PPF overall or with a specific PPF brand
As you can see, there are many reasons why people remove paint protection films from their vehicles. That’s why it’s crucial to use high-quality PPFs from trusted brands in the first place (when applying them to the car). High-quality PPFs tend to last longer, be more resistant to damage, and improve your car’s appearance.
What To Do After Paint Protection Film Removal?
After removing the transparent bra from your car, you shouldn’t stop there. There are some additional steps that you should take to keep the vehicle protected further.
1. Polish The Vehicle
If you had PPF applied to the whole car, polishing and compounding the vehicle may not be essential.
However, if you only had PPF partially installed, there would be a difference in the paint, especially on the edges of the film. The only way to remove them and make the whole car’s paint equal is by polishing your car.
Polishing will enhance the paint and prepare it for a new form of paint protection.
2. Apply New Paint Protection
After removing the paint protection film, the worst thing you can do is leave the car’s paint unprotected. The clear coat will become exposed to all the harmful external elements (UV rays, rock chips, bird poops, acidic rains, etc.). In my opinion, a car should always have some form of paint protection applied.
Besides PPFs, there are other types of paint protection: waxes, sealants, and ceramic coatings. They are fantastic, too, and cheaper to apply than clear bras, so make sure to think about them.
So, keep the car’s paint protected all the time, and it’ll last for years, probably longer than the engine.
Final Words
As you can see above, paint protection film removal isn’t backbreaking and doesn’t require plenty of tools. You only need to be careful and patient when removing it. I hope that now you know the basics that you’ll be able to remove it from your car successfully.
In the end, here’s an interesting video of removing PPF without using heat guns or steam cleaners. It’s great if you don’t have any of the tools needed in the guide above. I find it very interesting, hope you’ll too!