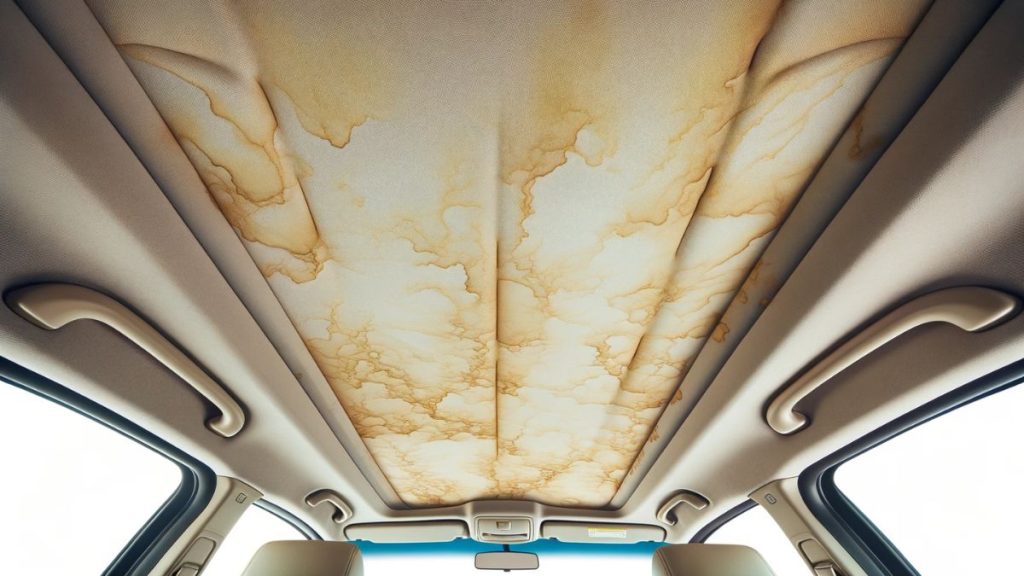
Smokers’ cars are usually one of the dirtiest ones (I know because I was a smoker once), and together with the area around the ashtray, the car ceiling is the dirtiest place, full of cigarette smoke and smell.
In this post, I will show you how to clean your car headliner from cigarette smoke smell without damaging it.
Key Takeaways:
- Car headliners should always be cleaned with caution to prevent sagging.
- High-quality all-purpose cleaner or foam fabric cleaner should be used to clean stains on the car ceiling.
- Too much brushing or too much cleaner will damage the headliner.
- Steam cleaner should be used to remove any remaining stains and smoke smell from the headliner.
- When everything’s clean, odor neutralizers help to remove any remaining scent from cigarettes and leave a nice, like-new smell in the car.
1. Do It Before Cleaning Anything Else

Before we dive into the exact steps for cleaning a car headliner, I want to tell you that you should do it before anything else inside the car.
Usually, if there are some minor stains in the headliner, you can clean it after cleaning the rest of the car’s interior, but if you clean the whole headliner that’s full of cigarette smoke, you should do it first.
When cleaning a filthy smoker’s car headliner, your car will probably get dirty during the process. That’s why you should do it first.
The second reason for cleaning the headliner first is because you need to allow it enough time to dry completely. Never return the car to the customer if it’s still wet, especially when talking about car headliners.
2. Vacuum The Headliner
Car headliners will often have plenty of ash inside, especially near the driver’s window, where it’s exposed to cigarette smoke the most.
You want to address those dirt particles first so you don’t scrub that dirt back into the headliner later on.
So, take your vacuum and thoroughly vacuum the whole headliner. Be as detailed as possible since it’ll make cleaning easier later on.
Related: Best Car Vacuums For Every Budget
I like to take some wider vacuum attachments when vacuuming the headliner since you don’t need too much suction power. Usually, headliners are extremely thin, which makes them easy and quick to vacuum.
3. Clean The Headliner
Now that the headliner is thoroughly vacuumed, you should take your preferred cleaning solution, dilute it, and gently spray on the headliner.
For this purpose, I recommend that you use Super Clean All Purpose Cleaner Degreaser. I’m using it every time the headliner is very dirty.
Super Clean will quickly soften and break up most of the cigarette smoke, dirt, and smell, which will make it easier to clean later on.
For this purpose, you should dilute Super Clean with distilled water in ratio 5:1 or 6:1, depending on the level of dirtiness of your car’s headliner.
When you’re spraying, make sure not to oversaturate the area. However, make sure that there’s enough product to break down that dirt and odor.
IMPORTANT: don’t spray two times in the same area.
When you spray the whole headliner (don’t forget to spray hidden areas behind sunshades), wait 1-2 minutes and proceed to the next step.
Also, if there are some tougher stains on the headliner, make sure to brush them with a detailing brush gently. Spray some super clean on your detailing brush, and gently scrub the stain with it. That’s for specific stains only (pen ink, etc.).
4. Steam Clean The Ceiling
Now that the headliner is sprayed with your desired cleaning solution, you should clean it using a high-quality steam cleaner. Why high-quality? Because they have more customizable options.
I recommend you use the McCulloch Steamer (check above). It has everything you need to safely and adequately clean the car’s headliner.
When steam cleaning the headliner, you should always run your steam cleaner on the lowest settings. So, not too much heat and steam. Again, you don’t want to unstick the headliner from the roof.
Here are quick steps you should follow:
- Choose the lowest settings on your steam cleaner.
- Attach a brush to the steamer (there are brush attachments for steamers).
- Wrap a clean microfiber towel around that brush attachment.
- Start cleaning the whole headliner thoroughly.
- Don’t oversaturate any area.
I also always wrap the microfiber cloth around the brush attachment. That’ll prevent the steamer from damaging the headliner, and it’ll also produce less heat.
5. Apply Odor Neutralizer To The Headliner
Cigarette smoke is extremely strong, and it’s hard to remove the odor entirely without using additional products. For this purpose, I like to use some odor neutralizers, but you can also use some odor removers that have scents inside.
There are plenty of odor neutralizers on Amazon and probably in most larger markets. Just make sure to pick the one you like and has excellent reviews.
Whether you like to use something neutral or with scent, that’s up to you. I don’t particularly appreciate using some odor removers that have additional scents inside. I always use a pure odor neutralizer that doesn’t leave any smell behind.
When it comes to applying odor neutralizers, don’t over-saturate the headliner. Odor neutralizers are potent enough with a light coat of application. Let it sit for a minute or two, and proceed to the next step.
6. Wipe Dry The Headliner
When you finish steam cleaning and applying some odor removal product to the car headliner, you should take a clean, dry microfiber towel (probably a few of them) and wipe the entire area.
When wiping the headliner, you can use a little bit of pressure, but not too much. The goal here is to pick up loosened dirt and smoke from the headliner, not to agitate it with a microfiber cloth.
Using a microfiber towel to wipe the headliner will also help pick up most of the moisture from it, so it’ll dry out quicker.
7. Do an Ozone Generator Treatment (OPTIONAL)
When you finish with everything, if you can still smell cigarette smoke inside the car, you can altogether remove it by doing an ozone generator treatment.
Ozone generators are excellent tools for removing any bad smells from the car (vomits, spills, cigarette smoke, etc.). Also, make sure that the headliner is dry before using an ozone generator.
Doing an ozone treatment is pretty straightforward: just put it in the car (somewhere in the center of the vehicle), turn it on, and wait for 1-2 hours until all the bad smells are removed. When it finishes, it’s important to vent the car for at least an hour or two. That’s because ozone treatment can be harmful to people, pets, and plants.
Here are a few situations when you should avoid doing the ozone generator treatment:
- Wet car: if you did the deep cleaning before the ozone generator treatment, you shouldn’t use it. Ozone generators shouldn’t be used for drying the car, only for removing bad odors.
- You didn’t clean the headliner: if you didn’t do all the steps above, an ozone treatment wouldn’t help you much. It can remove a bit of bad smell, but it’ll still stay in the car since everything is filthy. Ozone treatments will do their best when the car is immaculate and only the bad smell is left.
Now that you know those things to avoid, you know almost everything. If you want to know the exact steps for using an ozone generator, here’s a great video tutorial you should check out. He also shows you some precautions when using an ozone generator, so it’s worth checking out.
Final Words
As you can see, cleaning the cigarette smoke from the car headliner isn’t so straightforward, and it takes time. That’s why you should never smoke in the car. It makes too much mess.
If you’re a professional car detailer, make sure to price this task correctly since it takes a lot of dedication, time, skills, techniques, and attention to detail.
Similar Articles:

