Car headliner is safe to clean, but still, many people are afraid of doing that. In this post, I’ll show you the process I use to clean fabric headliners in cars. This process ensures everything stays in place except the stains.
I’ll show you two methods for cleaning headliners: one is to spot-clean the liner, and the second is to clean the whole car ceiling.
Key Takeaways:
- For cleaning car headliners, you need a fabric cleaner, detailing brushes, and microfiber towels.
- In most situations, the headliner should only be spot-cleaned to prevent oversaturating it with cleaning agents.
- If cleaned improperly, the headliner may sag, which is an expensive fix.
Spot-Cleaning The Headliner – My Recommendation
I always recommend spot-cleaning headliners in cars. The reason is that you don’t want to oversaturate the headliner and cause it to sag. Generally, headliners only have a few stains here and there, and that’s why there’s no need to clean the whole ceiling.
What you’ll need:
- Upholstery cleaner. I recommend using Chemical Guys Fabric Clean.
- A few microfiber towels.
- Soft detailing brushes.
1. Identify All The Stains
First things first, don’t just dive in when you see a stain on your car’s headliner. Take a minute to look over the entire area. It’s like planning your battle against the dirt. If you spot all the stains right from the start, you won’t miss any when you begin cleaning.
Why not make a game out of it? Grab a piece of paper and write down where each stain is. It’s like making a battle plan. Plus, it feels great to check them off one by one as you clean them up.
When I tackle the stains, I always start from the front of the car and move to the back. It’s my way of making sure I hit every spot without any backtracking. It keeps things neat and makes sure I don’t overlook anything.
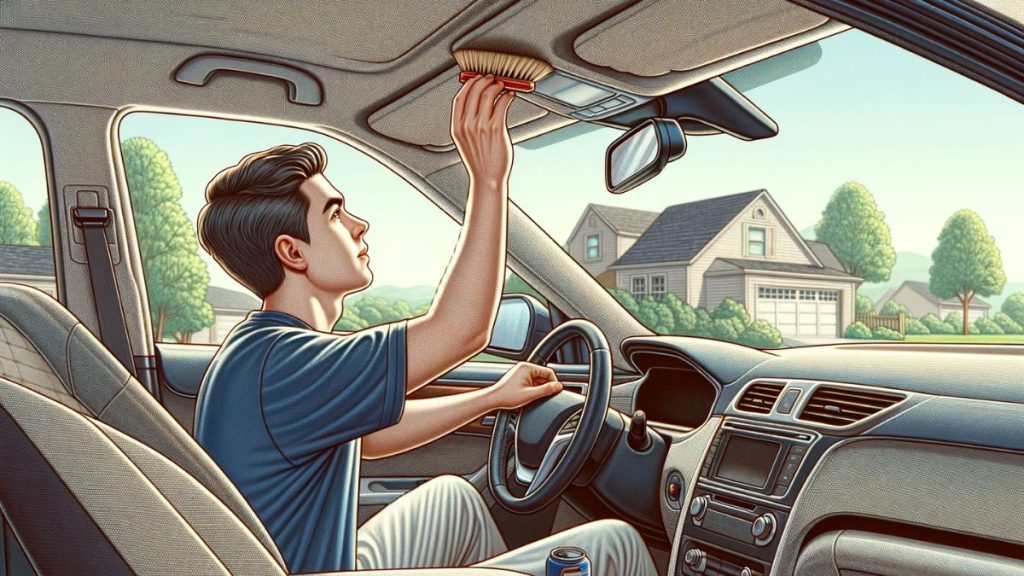
2. Spray Cleaner On a Soft Detailing Brush
Now, cleaning the headliner isn’t quite the same as scrubbing down the seats. Here’s a tip from my own experience: don’t spray the cleaner straight onto the headliner. Instead, give a soft detailing brush a good spritz.
This does two really helpful things.
- First off, a soft brush is gentle. It means you can scrub without worrying about hurting the headliner’s delicate surface.
- Second, by putting the cleaner on the brush, you control how much liquid goes on the fabric. Too much moisture can mess with the glue that keeps the headliner stuck up there. So this way, you keep it just damp enough to clean without causing any trouble.
3. Brush, Wipe, and Inspect The Stain
Alright, you’ve got your brush ready with cleaner. Now, let’s target that stubborn stain. Gently work on it in little circles with the brush. This helps the bristles get in deep and break up the stain, lifting away the grime.
After you’ve given it a good brush, grab a clean microfiber towel and wipe the area down. This step picks up all the dirt you just loosened and soaks up any extra cleaner, which keeps it from getting too wet.
Now, pause and check out the stain. If it’s still hanging around, don’t stress. Some tough stains might need a few more tries or maybe a tougher brush. I’ve switched brushes a couple of times before to make sure I get it all.
Just go through the steps again—spray, brush, wipe—and keep at it until you can’t see the stain anymore.
But remember, going over it more than three times isn’t the best idea, as it could start to unstick the headliner.
Cleaning The Whole Headliner – If It’s Very Dirty
At times, spot-cleaning won’t cut it. Maybe your headliner is uniformly dirty, or perhaps it’s covered in so many spots and stains that tackling them individually seems like an insurmountable task. In such cases, cleaning the whole headliner is your best bet.
What you’ll need:
- Larger soft brush.
- Fabric cleaner.
- Microfiber towels.
1. Apply The Cleaner on a Large Fabric Cleaning Brush
When it’s time to clean the entire headliner, the same rule from spot-cleaning applies: avoid spraying the cleaner directly onto the headliner. This time, however, you’ll be using a larger fabric cleaning brush, or even a leather brush, as recommended earlier.
Because of the larger surface area you’ll be tackling, you can afford to spray a bit more solution onto the brush. But remember, the goal is to dampen the brush, not drench it. Even when cleaning larger sections, we want to avoid oversaturating the headliner.
2. Agitate The Headliner With a Brush (Gently)
You’re all set to start cleaning with the cleaner applied to your larger brush. Just like with spot-cleaning, use small circular motions to agitate the dirt and stains, allowing the cleaner to work its magic.
From time to time, spray a bit cleaner onto the brush again. There’s no point in agitating a completely dry headliner since nothing can clean those stains.
3. Wipe off With a Clean Microfiber Cloth
After you’ve worked the cleaner into the first section of the headliner, it’s time to wipe it off with a clean microfiber cloth. Remember to do this gently to avoid damaging the fabric.
The microfiber cloth will absorb the cleaner and lift away the dirt that has been loosened by the brush. Using a clean cloth is crucial to avoid depositing any dirt back onto the headliner.
Once the first section (Front) is clean and dry, move on to the next section (Middle), and repeat the process. Apply the cleaner, agitate with the brush, and then wipe clean with the microfiber cloth.
Finally, tackle the last section (Back) using the same method. By working in this systematic manner, you ensure that the entire headliner is cleaned effectively without any area being missed or oversaturated.
4. Check The Results and Spot-Clean If Needed
Once you’ve finished cleaning all the sections of the headliner, it’s time for a final inspection. Take a moment to carefully check the entire headliner for any spots or stains that you may have missed.
It’s not uncommon to find a few stubborn stains or overlooked areas after the initial cleaning. But don’t worry. This doesn’t mean you need to clean the entire headliner again. Instead, simply use the spot-cleaning method that we discussed earlier for these areas.
Additional Tips For Cleaning Car Headliners
Here I wanted to share a few additional tips that may help you when cleaning headliners in cars.
Avoid Excess Moisture
One of the most important tips I can share when it comes to cleaning car headliners is to avoid excess moisture. Over-saturating the headliner with a cleaning solution, brushing too harshly, or leaving the headliner damp can all lead to unwanted consequences.
The main risk here is that too much moisture can cause the adhesive that holds the headliner to the car’s ceiling to weaken. If this adhesive loosens, it can result in a sagging headliner.
A sagging headliner isn’t just an eyesore—it’s also a pricey problem to fix. So, always be cautious with the amount of cleaning solution you use, make sure to wipe the headliner dry after cleaning, and above all, be gentle. This way, you’ll keep your headliner clean and intact.
Basic Tools and Product May Not Be Enough Sometimes
There may be occasions when your basic cleaning tools and products don’t quite get the job done. Even after a few passes, some stubborn stains may not completely disappear. In such cases, there’s one other option you could consider, although I only recommend this for those with experience: using a steam cleaner.
A steam cleaner can be effective in removing tough stains, but it’s not without its risks. The heat and moisture from the steam can potentially damage the adhesive holding the headliner in place if not used correctly.
Related: Best Steam Cleaners For Car Detailing
If you decide to use a steam cleaner, be extremely gentle and limit its use to as small a section as possible. The goal is to use the minimal amount of steam required to lift the stain without allowing heat or moisture to compromise the headliner’s glue.
Proceed with caution and remember: when it comes to using a steam cleaner on a car headliner, less is definitely more.
Not All Dirt and Stains Can Be Cleaned Safely
There comes a point in every car detailer’s life when they encounter a stain or a patch of dirt that seems impervious to all cleaning efforts—even when using a steam cleaner. If you find yourself in this situation, I want to emphasize: stay relaxed and recognize that you’ve done the best job possible.
If you’re working on a client’s car, it’s important to communicate clearly with them. Nicely explain that the stain is extremely stubborn and that any further cleaning procedures may risk damaging the headliner. It’s better to have an honest conversation about the limitations of cleaning than to risk causing unnecessary damage.
However, if the stain is really bothersome and you’re keen on making that part of the headliner look new, one possible solution could be to paint that section of the headliner. This should be considered a last resort, and matching the color perfectly to maintain a consistent look across the headliner is important.
When Should You Call in the Pros?
DIY cleaning is great for saving some cash and feeling good about doing things yourself, but sometimes, you’ve got to know when to call in the experts.
Here’s when to consider calling an expert:
- If that stain just won’t quit: You’ve tried and tried, but the stain’s still there. Pros have some heavy-duty stuff and tricks up their sleeves that can make a difference.
- When the roof lining gets droopy: If your headliner’s hanging down, that’s a sign the glue’s given up. Fixing this isn’t easy, and pros have the right gear to set things right.
- Feeling unsure about cleaning? If you’re not confident or worried you might mess up, better safe than sorry—let a pro handle it.
- Got a fancy headliner? If your car’s sporting something like suede, leather, or Alcantara up top, these materials are a bit high-maintenance and need special care that pros can provide.
In the end, calling a pro might save you money and hassle because fixing a botched cleaning job or a damaged headliner can cost a lot more than a pro-clean-up.
Similar Articles: