
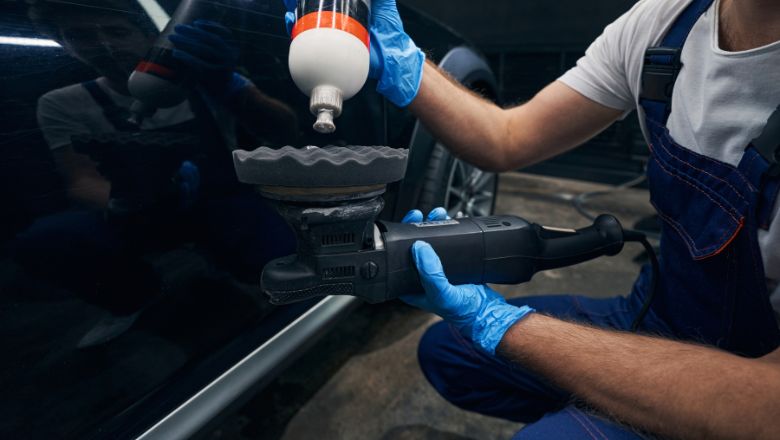
Waxing a car with a buffer is a much quicker way to apply paint protection to your vehicle when compared to waxing a car by hand. Not only is it quicker, but you’ll also be able to apply wax much easier, without elbow grease and overall too much physical activity. Here are the steps on how to wax a car with a buffer to get the best shine.
How to Prepare for Machine Waxing Your Car
Waxing your car with a machine requires some prep to ensure the best results.
Here’s a simplified guide:
- Keep the Car Out of Sunlight. Avoid waxing in direct sunlight or heat, especially for black cars, which heat up faster. The wax dries quickly on hot surfaces, making buffing difficult. Ensure your car is cool and shaded.
- Thoroughly Wash and Dry the Car. A clean surface is key. Wash, decontaminate, and polish the car’s exterior (if necessary) to remove all dirt. Regular maintenance might eliminate the need for polishing and decontamination. For detailed washing instructions, refer to these articles:
- Gather Your Materials.
- Car Wax (liquid is best for machine polishing)
- A car buffer (rotary or orbital) – affordable options on Amazon work well
- A soft buffing pad, like the Chemical Guys Hex-Logic Black Finishing Pad
- Several soft microfiber cloths to avoid scratches and swirl marks
With your car prepped and materials ready, you’re set to follow the step-by-step guide on machine waxing.
Related: Best Car Waxes and Sealants
How To Wax a Car With a Buffer: Simple Steps To Do
Finally, here’s the guide on waxing a car with a buffer. The process is simple, and I’ll try to describe each step you should make thoroughly.
Step 1: Apply Wax on The Pad
First things first, you should apply the wax on the pad. As I already told you, I suggest using liquid wax because it’s better when waxing a car with a buffer. It will more easily spread evenly over the surface.
Pour a few dots of wax on the buffing pad. 4-5 dots are enough to wax an entire car panel.
Step 2: Spread The Wax With a Machine Polisher

Now you should start spreading the wax all over the clear coat. I suggest splitting the car into sections and doing one section at a time. I like to split it to the front and read. So, I do the front first, and when I finish everything, I apply wax on the rear side of the vehicle.
Sometimes, you’ll accidentally spread the wax on trim or rubber surfaces. If that happens, make sure to immediately remove the wax from car trim and rubber surfaces because it may cause discoloration, and once the wax dries, it may be hard to remove. Just spray some all-purpose cleaner on the MF towel and clean it.
After spreading the wax over the surface, let it dry for a few minutes. Make sure to read the instructions on the bottle because each car wax needs a different curing time. With some car waxes, you won’t even need to wait for them to dry. And leaving wax on the car for too long is a mistake as well.
Step 3: Buff With a Clean Microfiber Towel

Now when the wax is dried on the clear coat, we should buff it out with a clean microfiber towel to remove any wax residue and achieve amazing results. For the whole car, you’ll need two to three microfiber towels. This is the only step requiring you to invest a bit more energy, haha.
- Fold the microfiber towel and start buffing the car to remove any wax residue.
- After each car panel, flip the towel over to a clean side.
- Apply only light pressure with your hands. Just a light, gentle pressure is enough to buff it out.
Helpful Tips To Get Better Results When Waxing
I just wanted to share a few helpful tips that may help you to get better results. So, here are a few tips I can give you:
- Don’t use large backing plates. You’ll often see companies promoting extremely large 10-inch backing plates and pads for applying waxes and paint sealants on cars. You don’t need them, and it’ll be hard to spread the wax with large polishing pads evenly. Pick a 5″ or 6″ backing plate and the corresponding pad. That’s all you need to apply wax to literally any vehicle.
- Make sure that the buffer and pads are completely clean. You don’t want any dirt or dust to end up on the car’s surface. A dirty pad can cause swirl marks and scratches on the clear coat.
- Don’t use high-speed settings on your machine buffer. You only need slow speed to spread the wax evenly, especially if you’re using a rotary polisher.
- Always read the instructions on the bottle. This is especially important for beginners since you don’t have so much experience, and every type of wax may need a different curing time or not need it at all.
- Do the paint correction if needed. If your car’s paint is full of swirl marks and scratches, don’t go straight away and wax the car. You should first remove swirl marks and scratches from the clear coat to get amazing results.
What’s The Best Car Wax Buffer?
It may be hard to answer what’s the best car wax buffer, but I’ll try to keep it simple. If you don’t need something for polishing and compounding, you can pick some cheap machine buffers from Amazon. Just make sure that it has the option to reduce the rotation speed.
If you’re a complete beginner, I suggest using an orbital polisher since they cause less heat and they’re easier to work with.
If I had to pick one buffer that’s best for beginners, I would pick this one:
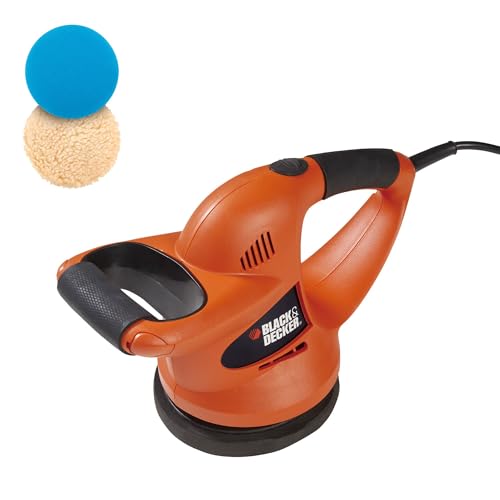
- Black+Decker 6-inch Random Orbit Waxer/Polisher is an extremely cheap buffer, and it’s more than enough to apply waxes on cars. You just need to get a dedicated buffer pad for waxing, and that’s all.
If you need something more professional that you can also use for polishing and compounding, I recommend you visit my article on Best Professional Car Polishers.
The Best Wax to Use With a Machine Buffer
There are three main types of car wax: paste wax, liquid wax, and spray wax. For waxing a car with a machine buffer, I suggest using only liquid waxes. I’m a big fan of paste waxes, but they’re only good for hand application.

In my opinion, Collinite 845 Insulator Wax is the best wax to use with a machine buffer. Buffing it out is easy, and it’s one of the longest-lasting waxes out there. You can expect it to last anywhere between 4-7 months with proper maintenance.
Frequently Asked Questions
I’m a big fan of hand waxing because I love to use natural carnauba wax in a paste form. However, waxing a car by using a buffer is a much easier and more efficient way of waxing vehicles because you will quickly spread the wax all over the surface.
It will depend on the quality of the automotive wax you use. Some cheap waxes will only last a few days, while more quality waxes will last up to 6-7 months. On average, expect to machine wax your car every 3 months to keep your car shiny and protected all the time.
If you want to quickly and effortlessly apply car wax on your car’s paint without doing too much work with your hands, I highly suggest applying wax with a buffer. If you’re a beginner, use a dual-action orbital polisher because they’re easier to work with.
Yes, an orbital buffer is probably the easiest type of machine to work with. It won’t generate too much heat, and it will be easy to spread the wax coat evenly on the surface.
Conclusion
And that’s how you wax a car with a buffer. In this guide, I tried to make everything simple, so even a complete beginner can quickly learn everything in this full guide and make their car’s paint shinier than ever.
Related posts: