Overspray can be a frustrating problem for any car owner, especially if you’re a DIY enthusiast who prefers to handle detailing at home.
While professional detailers often turn to aggressive techniques like wet sanding, using plastic razor blades, and similar, those methods can be risky. They may damage your paint if not done correctly.
Instead, I decided to show you a simple, step-by-step approach that anyone can use to safely remove overspray from their car.
This method uses basic tools and materials, making it ideal for those who detail their cars occasionally and want a safe, effective solution.
Follow this guide, and you’ll be able to remove overspray from your car without worry, restoring its smooth finish and glossy shine in no time.
What is Overspray, How it Happens, and Why You Should Remove it Quickly
Overspray happens when tiny paint particles end up on your car unintentionally. It’s not just limited to car paint jobs — it can occur when painting anything nearby, like a fence, house walls, or outdoor furniture.
Even if you’re not the one painting, your car could still be at risk. If a neighbor is working on a project or if it’s a windy day, overspray can travel from their property and settle on your car’s surface.
You should remove overspray as soon as possible because the longer it sits, the more it bonds with your car’s clear coat. As time passes, these paint particles become tougher to remove without damaging your paint.
And besides that, your car paint will look dull, dirt will stick to it like crazy, and it’ll be harder for you to keep the car clean because of that.
How to Identify Overspray on Your Car’s Paint

While you might be able to spot overspray with a visual inspection, not all types of paint are easy to see. Just because you don’t see it doesn’t mean it’s not there.
That’s why I recommend gliding your hand over the car’s surface after a thorough wash and drying. If you feel a rough texture, like tiny, gritty spots under your fingers, that’s a telltale sign of overspray.
Be careful not to confuse overspray with typical paint contamination. Although both can be felt using the finger glide test, paint contamination feels less rough and has much smaller particles.
Overspray, on the other hand, is usually more noticeable to the touch.
Step 1: Thoroughly Wash Your Car to Prepare for Overspray Removal
Never start removing overspray if your car isn’t completely clean, or you risk damaging the clear coat — something you definitely want to avoid.
Start by rinsing the car thoroughly with a pressure washer or a hose to remove loose dirt and debris. If you can use snow foam prior to rinsing, that would be even better!
Then, wash the car with soapy water and a microfiber wash mitt, using the two or three-bucket method to reduce the risk of scratches.
If you’re not sure how to properly wash your car without damaging the paint, check out my guide here, where I explain everything in detail.
Once the wash is complete, rinse the car again and dry it completely with a clean microfiber towel. When your car is spotless and dry, it’s ready for overspray removal.
Step 2: Decontaminate the Paint with a Clay Bar
Now comes the part where you’ll actually remove the overspray from your car’s clear coat.
Start by grabbing a clay bar and some clay bar lubricant. If you don’t have a dedicated clay bar lubricant, a detail spray will work just fine.
Break off a small piece of the clay bar from the larger bar — you don’t need to use the whole thing.
Spray a generous amount of lubricant on one section of the car’s surface (working on one body panel at a time), then gently glide the clay bar back and forth or side to side across the paint.
There’s no need to press hard; usually, the weight of your hand provides enough pressure to lift the overspray. Avoid using circular motions, as they can cause swirls.
Related: My Full Guide on Paint Decontamination
Once you’ve finished claying that section, wipe it off immediately with a clean, dry microfiber towel to remove any residue. Repeat this process for each section of the car.
Remember to frequently knead and fold the clay bar to expose a clean surface; you don’t want the dirt and contaminants collected on the clay to be rubbed back onto the paint.
And if you accidentally drop the clay bar on the ground, don’t reuse it — grab a new piece to avoid scratching your car’s finish.
Step 3: Inspect the Surface and Repeat the Clay Bar Process for Stubborn Areas
I always take my time to thoroughly inspect the car before moving on instead of just thinking it’s overspray-free and proceeding.
In my experience, there are almost always tiny spots that I either missed, or that were too stubborn to remove without pressing harder with the clay bar — and I never want to risk that.
To find these spots, I do the finger glide test again. By now, most of the car should feel extremely smooth, so any rough areas will stand out easily.
When I find them, I simply repeat the clay bar process (step 2) on those specific areas to make sure every bit of overspray is gone.
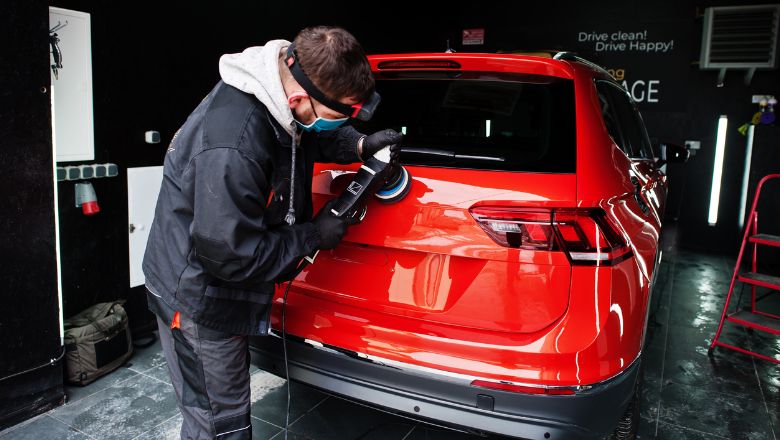
Bonus Step: Finish with a Polisher for a Flawless Shine

While you could realistically stop at Step 3, and that’s where most people would finish, I suggest going one step further for a truly flawless finish.
This extra step will make your car’s paint look incredibly shiny (clay bar do leave some marring on the paint), and the clear coat will feel smoother than ever.
Now, you don’t have to do this, but if you want the absolute best result, I highly recommend it.
Polishing can be a bit of a longer process, so I won’t go into every tiny detail here. All you really need is a good one-step polish, an orbital buffer, and a few microfiber towels to buff the car.
I’ve already written a detailed guide on how to polish a car with a buffer, so be sure to check that out if you decide to take this extra step and make your car look even better than ever.
And that’s it. When you finish with that, it’ll feel like overspray never even was on your vehicle, haha. I hope this was helpful!
If you need a guide on removing paint from car windows, I wrote a guide on that as well, so feel free to check it out!
