Machine polishing is the best, easiest, and most efficient way of paint correction. Some people polish their cars by hand, which is also okay, but you can’t expect nearly as good results as using a machine polisher. In this guide, I’ll show you how I polish cars, so you can follow the same procedure and get rid of all imperfections on your car’s paint.
Before You Start
Before we dive into the exact steps for polishing your car, I want to make sure that you know some essential things about polishing. I want to speak about polish machines, types of polishes, and pads.
When you understand everything about these, it will be much easier for you to polish your car.
Car Polishers

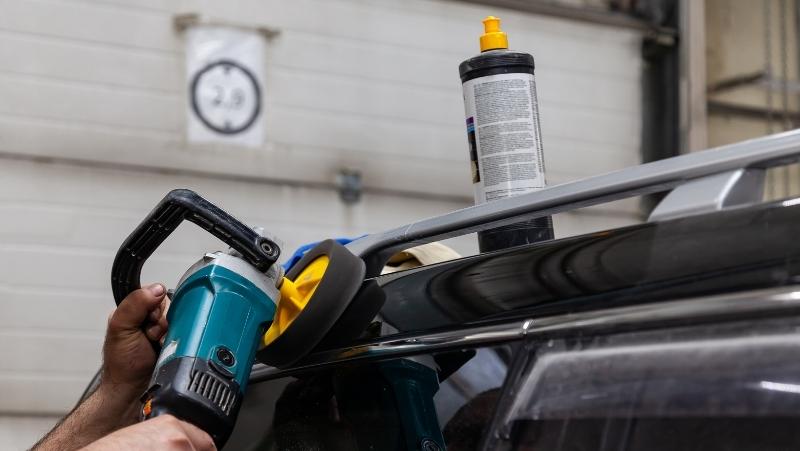
There are two main types of polishing machines that you can get for your car. You can choose between a rotary polisher or a dual-action polisher.
Long story short, if you’re a complete beginner, I suggest you buy a dual-action polisher.
Related: Best Car Detailing Polishers
By using a dual-action polisher, there’s less chance that you’ll burn the paint and cause additional damage to it. Nowadays, many professionals are also using dual-action polishers since they’re much safer than rotary ones.
On the other hand, if you already have some experience polishing vehicles, if you want, you can go with a rotary polisher. Rotary polishers tend to do the job quicker, but they also increase the chances of burning the paint.
Polishes and Pads
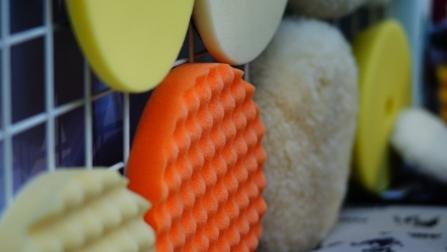
There are two main types of polishes: compounds and polishes. Also, together with polishes and compounds, you should use dedicated pads.
As a weekend detailer, you should use 6.5-inch buffing pads for most polishing jobs, covering larger areas. However, for some specific jobs, you might want to change to smaller size pads. Here I wrote a guide on choosing buffing pads, so make sure to check that out.
Now that you understand everything, we can start with the guide.
How To Polish a Car With a Machine Polisher: 5-Step Guide
Okay, now that you understand the basics about machine polishers, polishing compounds, and pads, let’s start with the guide.
Disclaimer: When polishing your car, there’s a chance of burning the paint. So, if you’re a complete beginner, I suggest you practice on some older car or some spare parts until you get the skill and the feeling.
STEP 1: Prepare Your Car For Polishing
Before anything, you should thoroughly prepare your car for polishing. Usually, that’ll include a thorough wash of your vehicle and paint decontamination.
I have written a thorough guide on How To Prepare Your Car For Polishing. Check it out for a step-by-step tutorial.
It’ll help you prepare the paint. Remember, the car has to be as clear as possible before polishing. You don’t want any contaminants to sit on the paint and be between the polishing pad and the clear coat.
STEP 2: Check The Condition Of The Paint
To do the polishing job properly, you should check the condition of the paint first. That includes checking the type of scratches on the color and checking the thickness of a clear coat.
The most common scratches on cars are light clear coat scratches that’ll quickly go away by polishing your vehicle.
When you know what type of scratches are there, you’ll know how to remove them, how abrasive products you should use, etc. Check my article 3 Types of Car Scratches. Over there, I explained everything.
The clear-coat thickness is another thing you should check. You can check it by using paint thickness gauges.
The clear coat is the thickest layer of the paint. That’s why it offers so much protection from UV rays, oxidation, etc.
Standard paint thickness is from 100-180 microns (μm). As long as the readings are above 80 microns, you’re safe to polish the vehicle. However, there’s no definitive answer since every car is different. With that said, if you’re suspicious about the paint, check the manufacturer’s data about the paint thickness.
For instance, Japanese cars tend to have thinner paint than European and US cars, so keep that in mind.
On average, the paint correction process removes 1-3 microns (μm) of the clear coat. Of course, it depends on the products you’re using (their abrasiveness).
STEP 3: Prepare Your Machine, Polish, and Pads
Now that you have checked everything, you can prepare your polisher and the pads. Decide what size and type of pad you need, and assemble it to the machine polisher.
Also, by now, you should know what type of polish you’ll use. Most people start with a compound for the 1st step and then finish with the finishing polish for the shine and gloss.
GENERAL RULE: whenever you want to polish your car, you should start with the least abrasive product. Use it in a small area and check the result. If that doesn’t work, use a more abrasive product.
The compound will remove paint defects, but very thin scratches and the haze will be left behind. So, you should always follow the compound with the finishing polish that’ll give the paint gloss and remove that haze caused by the compound.
I like to use Meguiar’s Ultimate Compound, and then for the 2nd step, use Meguiar’s Ultimate Polish. That way, I remove scratches and achieve the perfect gloss and shine of the paint.
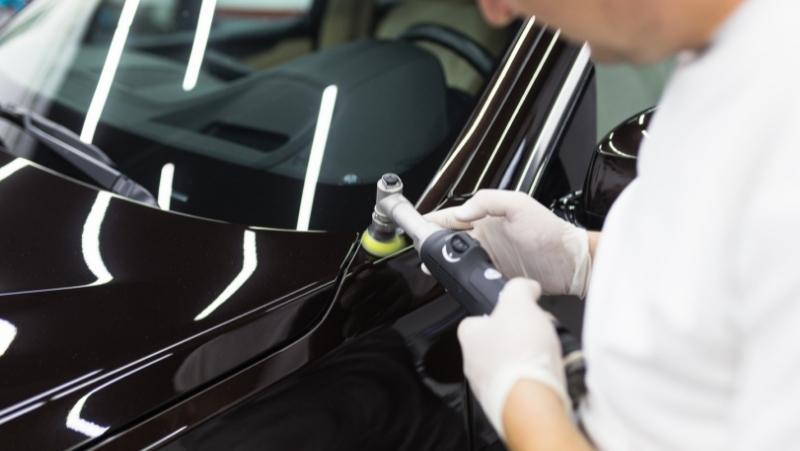
STEP 4: Start Polishing Your Car
Now, it’s time to start polishing your car.
Here are the steps you should follow:
Sometimes, you’ll also have to replace buffing pads because you won’t be able to polish everything with larger pads. Those are usually areas on the door, around door handles, around car emblems, etc.
STEP 5: Clean The Pad Periodically
The pad should be as clean as possible all the time. When you’re polishing, the pad gets soaked with the polish, and some clear-coat particles trap inside.
I like to clean buffing puds after each car panel. So, for instance, I clean them after polishing the hood, then again after polishing the roof, et cetera.
Protect The Paint After Polishing
Whenever you’re doing a paint correction (polishing or compounding), you should protect the paint when you finish. Protecting the paint will give it additional protection from UV rays, heat, oxidation, water, rain, dust particles, and even some scratches.
Three main paint protectants are:
- Waxes
- Sealants
- Ceramic Coatings
I suggest you apply either waxes or sealants since ceramic coatings are harder to apply and they require additional knowledge and experience.
Common Mistakes and How to Avoid Them
When it comes to machine polishing a car, there are several common mistakes that people often make. By being aware of these, you can ensure a smoother and more effective polishing process. I already mentioned all of this above, but let me repeat it once more so you understand the importance of those.
Not Preparing the Surface Properly
One of the most common mistakes is not preparing the car’s surface properly before starting the polishing process.
- Mistake: Skipping the washing and drying process.
- Solution: Always wash and dry your car thoroughly before you start polishing. This removes any dirt or debris that could potentially scratch the surface during the polishing process.
Using the Wrong Type of Polish
Another common mistake is using the wrong type of polish for your car’s paintwork.
- Mistake: Use a polish that is too abrasive or not abrasive enough.
- Solution: Make sure to choose a polish that is suitable for your car’s paintwork. If you’re unsure, it’s always a good idea to test the polish on a small, inconspicuous area first.
Applying Too Much Pressure
Applying too much pressure can also lead to problems.
- Mistake: Pressing too hard with the machine polisher.
- Solution: Let the machine do the work. Apply just enough pressure to keep the machine in contact with the surface, but don’t press down too hard.
Not Cleaning the Polishing Pad Often Enough
The polishing pad plays a crucial role in the polishing process, and not cleaning it often enough can lead to subpar results.
- Mistake: Using the polishing pad for too long.
- Solution: Clean your polishing pad regularly. Once a pad becomes clogged with polish, it becomes less effective and can even cause damage to the paintwork. If you have multiple buffing pads, you can also change them so you can clean them afterward.
Pros and Cons of Machine Polishing
I made a quick table where you can see all the benefits but also the disadvantages of polishing a car by using a machine polisher.
Table 1: Pros of Machine Polishing
| Pros of Machine Polishing | Details |
|---|---|
| Enhanced Shine and Gloss | Machine polishers distribute polish evenly, resulting in a high-gloss finish that enhances the car’s appearance. |
| Time and Effort Saving | Machine polishing is less labor-intensive and faster than manual polishing. It allows you to cover larger areas in less time, saving you effort and energy. |
| Effective Paint Correction | Machine polishers can effectively remove minor scratches, swirl marks, and oxidation, restoring the car’s paintwork to its original condition. |
| Long-lasting Results | The results of machine polishing are generally more durable and long-lasting compared to manual polishing. This means your car stays looking great for longer. |
| It’s less exhausting | Machine polishing is less exhausting, especially if you use a creeper seat for detailing. |
Table 2: Cons of Machine Polishing
| Cons of Machine Polishing | Details |
|---|---|
| Requires Skill and Experience | Improper use of a machine polisher can lead to paint damage. It’s important to learn how to use it properly or hire a professional. |
| Potential for Over-Polishing | Over-polishing can thin out the paintwork and clear coat, especially on edges and high points. This can lead to premature wear and tear on the car’s exterior. |
| Cost | Machine polishers and high-quality polishes can be expensive. However, considering the long-term benefits, it can be a worthwhile investment. |
| Equipment Maintenance | Machine polishers require regular maintenance and cleaning to keep them in good working condition. Neglecting this can lead to decreased performance and potential damage to your car’s paintwork. |
Frequently Asked Questions
Yes, you can, but there’s a chance of burning the paint. Rotary polishers produce much more heat than dual-action ones, and you should be careful when working with them. However, rotary polishers tend to do the job more quickly, and you’ll usually get better polishing results.
It depends on the condition of the paint. If there are very light scratches, using a polish only should be enough. However, if there are more scratches and oxidation, you’ll have to use a compound and then follow it with a polish.
All-in-one polishes are both compound and polish in one. They are used to both remove the scratches and leave a glossy finish. So, by using them, you only need a 1-step paint correction.
In my opinion, there are some great all-in-one polishes. I like to use 3D Cutting Compound and Finishing Polish. It’s just incredible.
Well, you can polish your car as many times as you want, as long as there is still enough of the clear coat on the paint. I suggest you polish your vehicle once a year.
When doing criss-cross movements, you’ll polish the paint from each angle and side, which improves the polishing result.
If you burn the paint while polishing, you’ll have to re-paint that car part. That’s why I’m always telling you that you shouldn’t put too much pressure on the polisher and use a DA polisher.
If you don’t apply any paint protection after polishing, nothing terrible will happen at first. However, your car will be more vulnerable to all the external factors. That means that the paint may again get in lousy condition very soon.
The answer is simple – the cost of production. More expensive cars will usually have a harder clear coat, which provides much better protection, can be polished more times, and is longer-lasting.
When you start polishing, if you see the paint on the buffing pad, that means that either there has never been a clear coat applied or that there’s no more clear coat on that car panel.
Final Verdict
I hope that now you know how to polish a car using a machine polisher. I tried to be as thorough as possible in this guide.
Of course, as you polish more and more cars, you’ll gain plenty of experience and additional skills. The most important thing is not to rush in the beginning. You should go slowly and learn all the important things.
Here’s also one great video you can watch to get a better understanding of all the steps that I’ve mentioned: