If you’re anything like me, you probably adore the thrill of off-roading. There’s nothing quite like taking your F150 Raptor or another adventure-ready beast through the mud, dirt, and rugged terrain.
But as much fun as those adventures are, the aftermath can be a different story.
Cleaning your car after an off-road trip can feel like a tough task, and I know some folks who even shy away from off-roading just to avoid the mess!
In this guide, I’ll walk you through the best steps to detail your car after an off-road adventure so you can focus more on the fun and less on the cleanup.
1. Start at a Self-Service Car Wash: The Mud Removal Trick
This is my go-to trick to make the whole detailing process easier and avoid any unwanted headaches at home.
I learned this the hard way after dealing with clogged drains a few times because of all the mud coming off the car (yeah, those drainage pipes can’t handle that much!).
Ever since then, I’ve made it a habit to stop by a self-service car wash right after an off-road trip. I use plain water to rinse off as much mud and debris as possible.
No need for soap or scrubbing at this point; just focus on removing the bulk of the mud. The goal here isn’t to make your car spotless — it’s just to get rid of that heavy layer of mud so you don’t end up with a yard or driveway full of dirt.
Once you’ve done that, you can head back home and start the real detailing work as outlined in the following steps.
2. Pre-Wash with Snow Foam for Maximum Dirt Removal
Now, I don’t just jump straight into washing my car with soap and water. Instead, I always recommend starting with a pre-wash using snow foam, and after off-roading, this step becomes more important than ever.
Even though you’ve removed most of the mud at the self-service car wash, there’s still a layer of dirt and grime clinging to the paint that won’t come off so easily. This is where snow foam comes in handy.
Snow foam works by softening and loosening up that stuck-on dirt, making it easier to remove without scrubbing or damaging the paint.
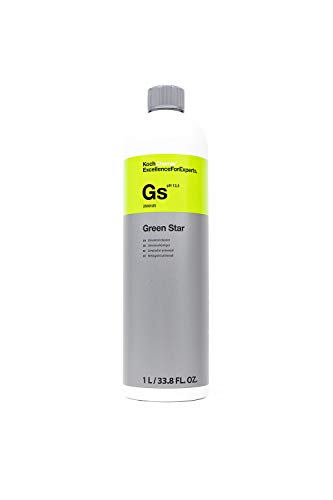
Spray a generous amount of snow foam onto your car. If you don’t have snow foam on hand, you can use a good alternative like Koch Chemie Green Star in a spray bottle — it works just as well.
Allow it to sit for a few minutes to break down the dirt, but don’t let it dry on the paint. This way, you’ll make sure the grime lifts off the surface, setting the stage for a proper wash in the next steps.
3. Rinse Thoroughly and Clean the Undercarriage
At this stage, you want to be extremely thorough with your rinse. Grab your pressure washer and take your time to remove as much dirt and debris as possible.
The goal here is to make sure the car is free of any remaining dirt stuck to the surface, prepping it for the hand wash that comes next.
Don’t rush this step — sometimes, it takes me around 10 minutes just to do a proper rinse after applying the snow foam.
Next, pay close attention to the undercarriage. If there was so much mud on the paint, imagine how much has accumulated beneath the car! Mud and dirt trapped under the vehicle can cause corrosion and other issues over time.
If you don’t have the right tools for cleaning the undercarriage, check out my guide on undercarriage cleaning, where I also share my favorite tools to make this task easier.
Taking the extra effort to clean the undercarriage now will save you from dealing with bigger problems down the road.
4. Wash with Soap and Water: The Deep Clean
And now, we finally get to the hand wash part — after all that prep work, you can see how much goes into cleaning up after an off-road adventure!
This is where the real deep clean begins. Grab a high-quality car soap, like Meguiar’s Gold Class Car Wash, and get ready to follow the two-bucket or three-bucket method for the safest wash.
Start from the top of the car and work your way down using only a high-quality microfiber wash mitt. Avoid using sponges, brushes, or anything that could scratch the paint.
A good soap will dissolve the remaining dirt and grime, while the microfiber mitt will gently lift and remove it without damaging the paint.
Don’t forget the wheels—they’re likely to be covered in mud and brake dust after your off-road adventure! I recommend using Sonax The Beast, which is by far the best wheel cleaner for extreme situations like this.
Spray it generously on the wheels, let it dwell for a few minutes, then agitate with a wheel brush to loosen up the dirt. Finally, rinse it all off, and your wheels will be back to looking their best.
If you notice the water in your “rinse” bucket getting dirty, replace it frequently. This will help prevent any dirt particles from finding their way back onto your mitt and potentially scratching the paint. Take your time here — it’s worth it for that perfect finish!
5. Use Iron Remover to Eliminate Embedded Contaminants
Once you’ve finished hand washing and rinsed the car, it should look incredibly clean — and it probably will be, to the naked eye.
However, that doesn’t mean it’s completely free from contaminants. After off-roading, various particles like brake dust, metal shavings, and pollutants can become embedded in the car’s paint. These particles are often invisible, but they can still cause damage over time.
To check for these contaminants, try gliding your finger across the paint. If it doesn’t feel perfectly smooth, there are likely still some contaminants bonded to the surface. This is where iron removers come into play.
Take a high-quality iron remover, like Sonax Iron+ Fallout Remover, and spray it evenly across the paint.
Let it sit for a few minutes to work its magic. You’ll notice that it turns purple in some areas — this is a good sign! It means the product is actively dissolving those tiny metal particles, like brake dust and other contaminants, that have stuck to your paint.
6. Final Rinse and Dry for a Spottles Finish
Now, it’s time for a final rinse to ensure your car is completely free of any remaining contaminants.
Take your time with this step — don’t rush it! Use your pressure washer or hose to thoroughly rinse every part of the car, following the same top-to-bottom method. Make sure you don’t miss any spots, especially around trim, emblems, and other hard-to-reach areas.
Once the rinse is complete, grab a plush, high-quality microfiber drying towel to wipe off the water and dry the car gently.
A good drying towel will absorb the water without leaving streaks or scratches. This will leave your car perfectly dry and set the stage for the next steps in the detailing process.
7. Protect with Wax or Sealant for Easier Future Washing
Now comes the part where you truly “detail” your car instead of just cleaning it. With the car completely dry, it’s time to apply a layer of protection to the paint. This is where wax, sealants, or even spray ceramic coatings come into play.
Not only will these products make your car look shinier, but they will also create a protective barrier that makes future washes much easier. Dirt, mud, and other contaminants won’t stick as easily, saving you time and effort down the road.
I’m personally a big fan of natural carnauba waxes like Collinite Insulator Wax. It gives a fantastic shine, but it doesn’t last as long as synthetic options.
If you’re looking for something more durable, you might want to try a paint sealant or a spray ceramic coating. These products offer longer-lasting protection and better resistance to environmental contaminants.
If you’re not sure how to apply waxes or sealants, don’t worry — I’ve got you covered with a step-by-step guide here.
Bonus Tip: Remove Wheels to Clean the Wheel Wells Properly
I didn’t mention this earlier because not everyone might have the tools or the space to do it, but if you do — removing the wheels is a game-changer for a deep clean.
You’ll need a proper jack to lift your car and remove all four wheels safely.
If you can do this after the second step, right after coming back from the self-service car wash, you’ll be able to really get in there and clean both the wheels and the wheel wells thoroughly.
All you usually need to clean the wheel wells is some All-purpose cleaner. Spray it generously inside the wheel wells, let it dwell for a few minutes, and then rinse it off.
This will help remove all the mud, grime, and road debris that tends to accumulate in these areas, keeping your car in great condition and preventing rust and other damage over time.
Taking the extra time to clean these hidden areas will make a big difference, especially after a rough off-road adventure!


