Polishing your car by hand is the simplest way to remove swirl marks and scratches if you don’t have a dedicated car polisher.
Polishing by hand isn’t anything complicated, except that it requires some elbow grease.
In this post, I’ll show you the exact process I follow to hand polish any car.
Step-by-Step Guide to Hand Polishing Your Car
Here are all the steps that you should follow to polish your car by hand.
Step 1: Prepare Your Car For Polishing
First thing first, to get the best results, you need to prepare your car for polishing. The guide is comprehensive and takes you through every step needed to get your car 100% prepared for polishing or compounding.
In short, you’ll have to:
- Thoroughly wash the car
- Clay bar the vehicle to remove any contaminants
You should properly prepare your vehicle because you don’t want anything between a polishing pad and the paint (contaminants, waxes, sealants, etc.). When the car is spotless, you’ll get fantastic polishing results, and you’ll do it quicker.
Step 2: Gather The Materials
Of course, before you can polish your car by hand, you need to make sure that you have all the equipment required.
For polishing your car by hand, you’ll need:
- Compound and polish paste or liquid: there are plenty of options to choose from, but I suggest you use Meguiar’s Ultimate Compound and Meguiar’s Ultimate Polish. That way, you can get fantastic results. First, you should use the compound to remove swirl marks and scratches, and then you should use a polish to enhance the paint and remove the haze left by the compound.
- Applicator pad: you can use whichever applicator pad you like, but I highly suggest using a grip applicator pad such as No products found..
- A few microfiber towels: You’ll be using them to wipe off the excess polish or compound left on the paint after you finish buffing with the pad.
All those products aren’t expensive, and even better, you can use them more than once since they’ll last you pretty long. So, that’s a one-time investment for a few applications.
Step 3: Work The Product Into The Paint
Now, you can start polishing your car and remove swirl marks and scratches. It would be best if you always started with a compound. The compound is more abrasive than the polish and will quickly remove scratches and paint imperfections.
Then, after you finish polishing with a compound, repeat the process using the final polish to enhance the paint and remove the haze left by the compound.
Here are quick steps you should follow:
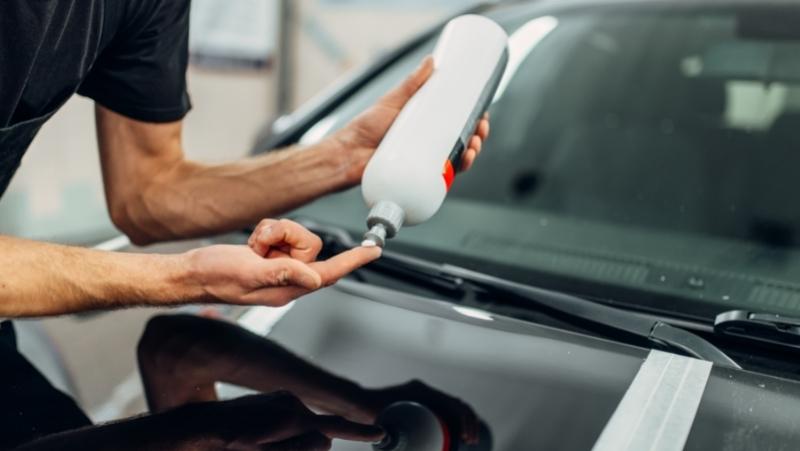
- Apply compound or polish to the applicator pad: pour the product onto the buffing pad. Make sure not to use too much product. 5-6 dots will be enough.
- Gently start polishing in circular motions: don’t use too much pressure on the applicator pad. Just make circular motions in all directions. Make sure to polish every single part of the section thoroughly.
- Work in small 20×20 inches sections: when you’re polishing by hand, you should work in smaller areas, which will help you to do a better job and not mess up anything. In my opinion, you should polish each section for a minute or two.
By following these steps, you’ll get fantastic results.
Step 4: Wipe Off the Residue After Each Section
Whenever you finish one section, you should wipe off the excess. You should do it as soon as you finish polishing that section because you shouldn’t allow the product to dry on the paint.
So, use a clean microfiber towel and buff the area you have just polished. Also, I suggest folding the towel so the pressure is even. Wiping off is easy and quick, so make sure not to skip it or wait too long after polishing.
If the polish dries on the paint, it can be hard to remove it, and that’s why I’m emphasizing the importance of this step.
Step 5: Periodically Clean the Applicator Pad
A clean pad leads to the best results. When you’re polishing, the pad will become dirty, and there will be some clear coat particles trapped inside. So you can’t expect good results with a dirty pad.
I suggest cleaning the pad after polishing each car panel. For instance, when you finish polishing the hood, clean the buffing pad. The same applies to other car panels.
Cleaning an applicator pad is easy. However, if you don’t know how to do it, here’s an excellent tutorial for that, so check it out (above).
Step 6: Apply Wax or Sealant
It would be a shame to leave the paint unprotected after polishing. For that, you can use waxes, sealants, or ceramic coatings.
I suggest that you clean any residue from polishing and then apply your preferable paint protectant.
Applying waxes and sealants is easy and will protect your paint from the lightest scratches, UV rays, heat, and other external factors. It’ll also make your color hydrophobic, which makes it easier to drive the car during rain.
Check out my recommended car waxes here.
A general guide for applying car wax:
- Pour some wax into the applicator pad
- Apply it to the paint by gently making circular motions
- Let it dry for a few minutes
- Buff it with a clean microfiber towel
Of course, every wax or sealant is different, so always read the instructions on the bottle to apply it 100% correctly.
Pros and Cons of Hand Polishing The Vehicle
As always, there are some positive and negative sides to hand polishing your vehicle. Check them out in the table below.
PROS
- You won’t spend a lot of money on buying polish machines, etc.
- There’s less chance that you’ll burn the paint, which can easily happen with rotary polishers.
- You can do it anywhere since you don’t need a power source
- Hand polishing may be an excellent option for mobile detailers.
CONS
- It’ll take a lot of time to polish the whole vehicle
- You’ll get tired very quickly.
- Results aren’t as good as with a machine polisher.
- You need to work in smaller sections than with a machine polisher.
- You can’t use large pads.
Common Hand Polishing Mistakes and How To Avoid Them
Here are some common mistakes people make when hand polishing the car. Make sure to avoid doing them.
1. Not Cleaning the Car Properly Before Polishing: One of the most common mistakes is not thoroughly cleaning the car before starting the polishing process. Any dirt or debris left on the car can cause scratches during polishing.
How to Avoid: Always wash your car thoroughly and dry it completely before starting the polishing process. This will ensure that the surface is clean and ready for polishing.
2. Using the Wrong Type of Applicator: Using the wrong type of applicator can lead to uneven application of the polish and may not give the desired results.
How to Avoid: Always use a foam or microfiber applicator for polishing. These types of applicators are designed to evenly distribute the polish and reduce the risk of scratching the paint.
3. Applying Too Much Polish: Applying too much polish at once can make it difficult to work the polish into the paint and can lead to a patchy finish.
How to Avoid: Always start with a small amount of polish on the applicator. You can always add more if needed, but it’s much harder to remove excess polish once it’s been applied.
FAQ
Yes, you can polish a car without the preparation stage, but I highly recommend you never do that. If the paint is dirty, all that dirt will scrub on the surface and damage the color even more when you start polishing. When you polish, you need a 100% clean surface.
The compound is a more abrasive product, and you should use it to cut the paint and remove swirl marks and scratches. After that, you should use a polish to remove the haze left by the compound and get that perfect deep paint appearance.
Yes, you can polish using a microfiber towel, but I suggest you use a dedicated grip applicator pad. With an applicator pad, it’s easier to polish since you have something to hold tight in your hands.
Well, I like to clean it after polishing each panel. So, for instance, I clean it after polishing the hood, after doors, roof, etc. You get the point. The more you clean it, the better results you’ll get.
It’s hard to tell, but if you do a 2-step paint correction (compound and polish), you’ll need at least 3-4 hours for each step. So, it’ll take around 7-8 hours to polish your car and a lot of elbow grease.
I’d say that you can buy everything you need for less than $50, which is amazing. Of course, I didn’t count washing products, only products and equipment needed for polishing. It’s much cheaper if you compare it to machine polishing, for which you’ll need at least $200 for a mid-quality polisher.
There’s no definitive answer, but you’ll get much better and quicker results if you use a dedicated machine polisher.
Also, make sure to check my eleven car polishing tips and tricks. I wrote them for machine polishing, but most of them can be applied to hand polishing too.
In the end, here’s a fantastic video from Epic Automotive Detailing where he explains how to polish a car by hand. So, if you’re more into video guides, that’s the tutorial I highly recommend.
And lastly, here’s the image that I created which illustrates the process, so feel free to share it 🙂
