Car detailing at home isn’t as hard as many people think. However, it’s important to follow a proven procedure in order to get perfect results after the wash.
Today, I’ll show you the ultimate guide on how to detail your car to perfection. I’ll show you all the steps you need to take to detail a car interior, as well as a car exterior.
Since most of these steps can be explained in a much longer format, I’ll make sure to link out to other resources on my blog, which will help you get more in-depth information on specific steps of car detailing.
How To Detail a Car Exterior
Here’s how to detail a car exterior.
Step 1: Clean the engine bay
Keeping the engine bay clean is important, as the dirt and grime buildup accumulates quickly in that area, which can lead to damage to some rubber hoses in the engine department. Furthermore, a clean engine bay may also help you identify fluid and oil leaks and the first signs of corrosion.
How to wash the engine bay:
- Protect sensitive parts with plastic bags and disconnect the car’s battery.
- Remove or vacuum any larger specks of dirt (leaves, branches, etc.)
- Spray the engine bay with a degreaser or an APC
- Brush everything to loosen the dirt and dust
- Rinse the engine off by using a garden hose or a pressure washer
- Use compressed air or microfiber towels to dry the engine compartment
- Reinstall the battery
- Apply dressing to all plastic parts
Personally, I prefer using an APC (all-purpose cleaner), but if the engine has a lot of oil leaks, it’s better to use a high-quality degreaser such as Simple Green cleaner and degreaser.
Step 2: Wash the undercarriage of a car
Washing the car undercarriage is often neglected, and not many people do it. But if you want to properly detail the whole car, you shouldn’t forget to clean the undercarriage.
Washing the undercarriage is pretty simple:
- Use a power washer or a garden hose and thoroughly wash all the dirt and grime from the undercarriage car parts.
- To do that quicker, I highly suggest you get an undercarriage cleaner from Amazon.
I wrote a thorough guide on washing the car’s undercarriage, so make sure to check it out.
Step 3: Wash the wheels
Before you proceed to wash the car, you should first clean the wheels and tires. They’re usually extremely dirty, and it’s easier if you wash them before.
Quick steps for washing car wheels:
- Spray wheels with a wheel cleaner
- Thoroughly brush the wheels to remove all the brake dust, dirt, and other contaminants
- Rinse
- Wash with a car wash soap and a microfiber wash mitt
- Rinse again
Those were the quick steps, but if you want to get in-depth info on cleaning wheels and tires, make sure to check the link mentioned above.
Step 4: Wash the car
Now that the undercarriage and wheels are clean, you should wash the whole vehicle.
Here’s how I like to do it:
- Pre-wash the car with the snow foam to loosen the dirt, bugs, and other contaminants
- Rinse the vehicle.
- Do a contact wash with a car wash soap and a microfiber wash mitt. Always use the two or three-bucket method.
- Rinse and dry the vehicle with a clean microfiber drying towel or by using an air compressor.
I deeply covered this topic in my article on How To Wash a Car The Right Way, so you can read it if you need a detailed guide on washing the car.
Step 5: Paint decontamination with a clay bar
After you wash the car, the paint will be clean of dirt and contaminants. However, if you never clayed your vehicle, the paint won’t be smooth, meaning that there’s still some dirt stuck to the paint. That’s fixed by doing a clay bar treatment.
Clay bar treatment will make the paint perfectly smooth and clean, leaving the finish ready for polishing and paint protection.
Steps to do a clay bar treatment on the vehicle:
- Prepare a clay bar or clay mitt, and a clay bar lubricant
- Spray clay bar lubricant on the car
- Start claying the vehicle in straight motions
- Work in smaller sections (one car part at a time)
- Fold the clay bar after each section so you don’t drag the dirt all over the car
Step 6: Polish and compound to remove swirl marks and scratches
Even though it cleans the paint, clay bar treatment will leave marring on the paint. They can easily be fixed by polishing the vehicle, and that’s the next step you should do.
Compounding and polishing the car’s paint will remove paint imperfections such as swirl marks and most car paint scratches. Some very deep scratches may not be removed, but still, the car paint will be enhanced with a fantastic gloss and shine.
Even though it can be done by hand, I highly suggest that you always polish your car by using a machine polisher. It’s a much easier and more effective approach to do paint correction.

After you have polished the vehicle by following the article in the link above, make sure to wipe the whole car with an IPA solution. IPA solution removes all the polish residue from the car, making it ready for paint protectants.
Step 7: Apply dressings to plastic parts and the tires
Faded car plastics and tires contribute to the poor appearance of the car, even on newer vehicles. To keep them looking shiny like new, you should apply dressings to them. Dressings condition plastics and tires, which brings back the original look, but more importantly, dressings protect them from UV rays, heat, and other harmful factors.
If the plastic parts on your vehicle are faded, I highly suggest you check my detailed guide on restoring faded plastic parts. Everything’s covered in a comprehensive step-by-step guide, so it’ll be pretty easy to follow.
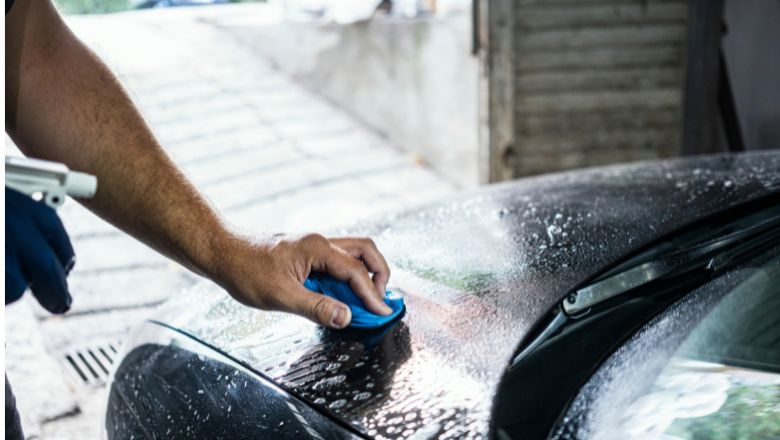
Step 8: Apply paint protection
Paint protection is one of the final steps you should take when detailing your car. Paint protectants give your car additional shine and gloss but also prevent UV rays, bird poops, acid rains, heat, salt, and other contaminants from damaging the clear coat on your vehicle.
Three main types of paint protectants are car waxes, car sealants, and ceramic coatings. Besides them, you can also wrap a paint protection film to your vehicle, which is the ultimate (but also the most expensive) kind of car paint protectant.
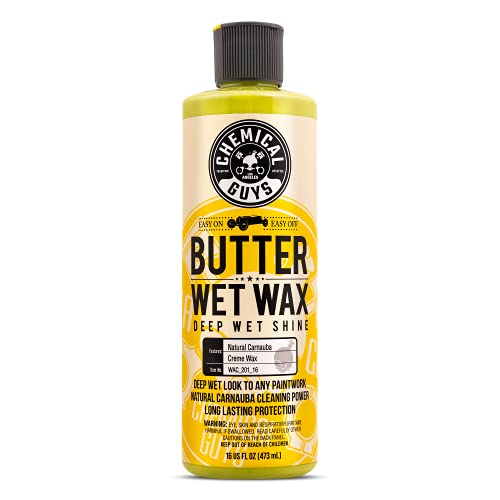
My personal favorite is car wax, but you can apply any kind of protection that you want. Briefly, waxes give your car the best shine, sealants are easy to apply and last longer than waxes, ceramic coatings last the longest, and paint protection films offer the best protection, even from swirl marks and scratches.
When applying protection to the paint, I also suggest you protect car headlights from UV rays and heat. You can do it by wrapping them into a PPF or applying a ceramic coating.
Step 9: Cleaning car windows
The last step I always do when detailing cars at home is to clean car windows. Cleaning car windows to perfection is pretty straightforward if you follow basic principles.
Here are a few tips to clean car windows properly:
- Use two microfiber towels: one waffle microfiber towel for cleaning, and one standard microfiber cloth for buffing the windows
- Spray an automotive glass cleaner on the waffle microfiber cloth
- Wipe the glass in all directions
- Dry and buff the glass to get rid of streaks
And that’s it when it comes to detailing the car exterior. Now you have a completely clean and protected vehicle that’s ready for the season.
How To Detail a Car Interior
Here’s how to detail a car’s interior.
Step 1: Take the trash and personal things out
Just as you start detailing a car interior, you should immediately remove all the trash and personal things from the vehicle. That usually includes old checks, receipts, coins, bottles, bags, larger specks of dirt, some tools, chargers, and more. Those things will just disturb you while detailing the car interior, so it’s better to get rid of them asap.
I usually take a trash bag and throw all the trash inside, and for the personal stuff, I like to put everything in a container so that I can easily return important things back to the vehicle once I’m finished with detailing.
Step 2: Remove car seats (optional)
Removing car seats is important if your car is extremely filthy. Otherwise, you won’t be able to deep clean carpets beneath the seat, leaving a lot of dirt sitting in the car even after you detail it. I have put removing car seats as an optional step since not everyone wants to remove their car seats because of the additional work and the worry about the airbag light coming on after removing jacks.
For all of you that would love to remove car seats but don’t know how you can check my guide on removing car seats properly, so no airbag light error shows on your car’s dashboard.
Step 3: Vacuum the car from top to the bottom
By vacuuming the car, you’ll get rid of all the dust, grime, and dirt particles from your vehicle. You should start vacuuming the car from top to bottom. I usually start with car doors, then vacuum the dashboard and the center console, and then I continue vacuuming carpets, seats, and the trunk area. That way, I never miss any spots, and everything’s perfectly clean and ready for deep cleaning (shampooing).
If you don’t have a vacuum, check out my recommendations for the best car vacuums under $150. It’s not a lot of money, and it’ll help you a lot when vacuuming. Also, use narrow attachments when vacuuming. That way, you’ll have more suction power, but you’ll also be able to vacuum the dirt from all the nooks and crannies in the vehicle.
Step 4: Remove stains from the headliner
Car headliners are usually pretty clean, but if you have kids or you smoke in your vehicle, there’s a big chance that the headliner will be filthy.
Many people are afraid to clean car headliners because of possible sagging problems. I cleaned tens of headliners, and I never had any problems, so in my opinion, it’s safe to clean car headliners if you follow some basic principles.
Here are a few things to have in mind when cleaning the headliner in your vehicle:
- Buy a high-quality foamy carpet cleaner.
- Don’t spray it directly on the headliner. Instead, spray the cleaner on the brush.
- Gently brush the stained area with a brush, or you can even use a microfiber towel.
- Don’t oversaturate the headliner with a cleaner. You don’t want it to get wet.
- As soon as you clean the stain, wipe the area with a clean microfiber cloth to remove as much residue as possible.
If you’re a beginner, I suggest only spot-cleaning car headliners. So, you don’t need to clean the whole surface; clean only dirty areas instead.
Related: Clean Cigarette Smoke From Car Headliner
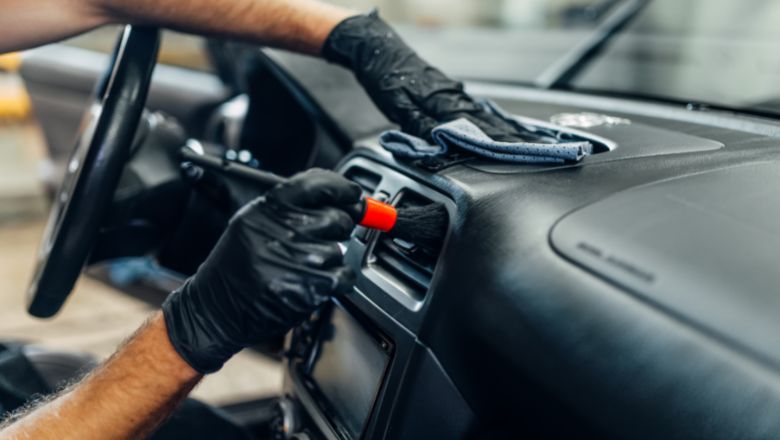
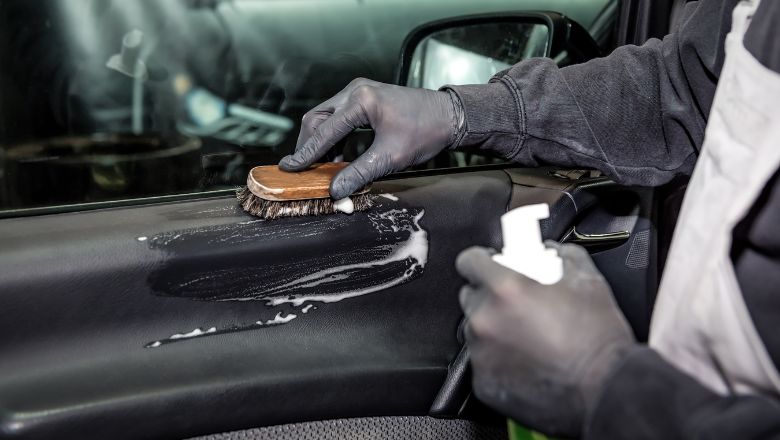
Step 5: Clean plastic and vinyl parts
After cleaning the headliner, I like to clean all the doors, dashboard, door jambs, center console, armrest, and all the plastics or vinyl parts in the car (including the trunk). That way, everything will be clean and ready for shampooing and deep cleaning of the vehicle.
You’ll need a detailing brush, an all-purpose cleaner or interior cleaner, a leather cleaner if you have leather parts and a few microfiber towels.
Here’s how I do it; you can use this method on all car parts:
- Spray the cleaner on the brush
- Agitate the area with a brush
- Wipe off with a clean microfiber towel
- Repeat if needed on extremely filthy car parts
When everything is clean, you can proceed to the next step, which will be the deep cleaning of the car.
Step 6: Deep clean carpets, safety belts, and seats
Deep cleaning is the longest part of interior car detailing, but it’s an extremely important step to do if you want a perfectly detailed vehicle. By deep cleaning, you’ll remove all the dirt that’s stuck in carpets, seats, seat belts, and other upholstery in vehicles. Also, shampooing will remove bad odors from your car, which is another important reason you should deep clean your vehicle.
If you don’t have a carpet extractor but have a shop vac, check my guide on turning a shop vac into a carpet extractor. That way, you’ll be able to deep clean your car without buying expensive extractors.
Step 7: Re-install car seats if you removed them
If you removed the seats from your vehicle, it is now time to re-install them back to the vehicle. Make sure not to scratch the car when installing them back, and just do all the steps you did when removing them, just in reverse order.
Step 8: Apply protection to the car interior
Applying protection to your vehicle’s interior surfaces is important to keep it looking new and repel dust and lint and prevent cracking, fading, and damage from heat, UV rays, and other harmful factors.
Here’s what I use:
- Leather conditioners for all the leather parts (wheel, seats, armrest, etc.)
- Interior protectants for plastic parts
- Fabric guard to make upholstery parts hydrophobic
I also sometimes use ceramic coatings for leather seats and plastic surfaces for high-end detailing.
Step 9: Clean windows and other glass surfaces
The last step is to clean the windows. You may wonder why I do it at the end. The answer is simple: when applying protectants, a few particles often end up on windows, making them dirty. That’s why I clean all glass surfaces when everything else is finished.
It’s pretty simple: I use an automotive glass cleaner (I recommend using Gyeon Quartz Glass Cleaner), spray it on a waffle microfiber cloth, clean the glass, and then I wipe the glass off with a clean microfiber towel.
When I’m cleaning glass surfaces, I’ll often clean the cluster and the infotainment system so they don’t have any streaks left from interior protectants.
Related: Best Car Window Cleaning Tools
And when everything’s as clean as possible, you might want to put some nice air freshener in your car. I like vent clip air fresheners from CG, which you can see below:

How Long Does It Take To Detail a Car?
It takes between four to eight hours to detail a vehicle in a decent condition. But of course, there are several reasons that affect the time it takes to detail a car.
The Condition of Your Car
If a car is well-conditioned and doesn’t require paint correction, you’ll probably be able to detail the car within three to four hours.
On the other hand, some extremely dirty and neglected vehicles will require you to do everything from washing, paint decontamination, paint correction, deep cleaning, etc…. and it can take up to 12 hours to detail one car.
I’ve had situations in which I’d spend two or three days detailing just one single vehicle.
Your Experience in Detailing Cars
Your experience with detailing vehicles is one of the most important factors that affect the time it takes you to detail cars.
As you detail more and more cars, you’ll gain experience and knowledge on how to do certain tasks quicker and in what order to make the most out of your time.
For example, the first time I was deep cleaning a car, it took me ca. ten hours to do it. Today, I can do it in ca. four to six hours, depending on the condition of the vehicle.
What Kind of Detail You Do
If you only opt for exterior detail, it will probably take you between five to eight hours to finish a car. And that includes even one-step paint correction.
For instance, you can probably finish a wash and wax job within an hour or two.
But if you decide to go deep and make a full detail, of course, it’ll last much longer. Don’t expect that you’ll be able to wash, decontaminate, polish, and protect a car within just a few hours. No way! At least from my experience.
Products You Work With
Besides your knowledge, the tools and products you use largely affect the time it takes to detail a car, even if it’s a small one.
I don’t say that you should go out and buy the most expensive tools and products for everything, but always do your research and buy car detailing products that are worth the money and that finish the job quickly.
For instance, I once tried some Armor All products to wash my car, and while Armor All is a great company for a beginner in the auto detailing world, their products can’t be compared to some better companies such as Gyeon.
Frequently Asked Questions
I’m sure that you’ll also have some additional questions, so here I’m bringing you the most common questions people ask when it comes to detailing their cars.
For detailing a car, you’ll need car wash buckets, microfiber cloths, car wash soap, power washer, car polishers, polishing pastes, LED lights, vacuum, carpet extractors, paint protectants, interior protectants, leather cleaners, all-purpose cleaners, automotive glass cleaner, detailing brushes, applicators, and other equipment if needed.
You can save a lot of money by detailing your car yourself. It may cost you at first while you gather all the equipment and supplies, but it’s a money saver in the long run.
Detailing a car is not a difficult task. However, it’s a slow process that should be done with caution and by following proven methods and techniques in order to get perfect results. You’ll need to gather some experience to do it quicker and better.
Compounding and polishing are typical procedures when detailing cars, so they should remove scratches from the car’s paint. Of course, only the ones that didn’t go through the clear coat.
I suggest doing full detail on your car once a year. That way, you’ll keep your car in like-a-new condition for a long. Of course, you won’t need to polish it or deep clean it every time, but still, once a year, you should do a thorough cleanup of your car’s interior and exterior.
The difference between detailing and cleaning a car is in all the procedures that are done in that process. Cleaning a car means only making the car clean of dirt, dust, and grime, while detailing means cleaning everything thoroughly and also applying protectants to various car parts (paint, leather, plastics, tires, etc.).